One of my biggest obsessions from one of my favorite decades, the seventies, is the graphic design motif of bold, colorful stripes, often cozied up next to one another in a rainbow or half rainbow.
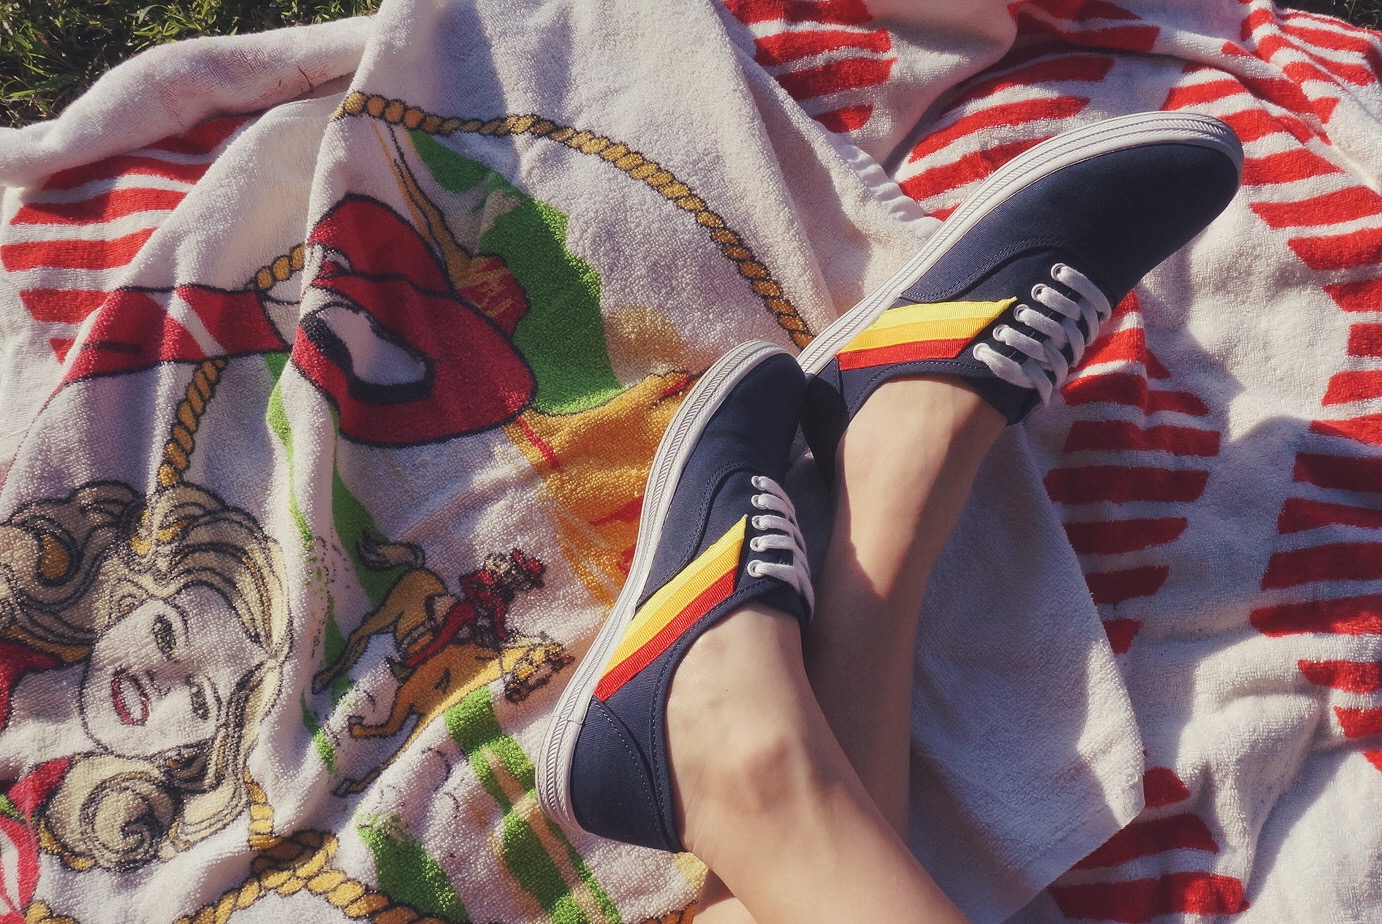
I decided I had to get this look on to my feet somehow, hence these babies: 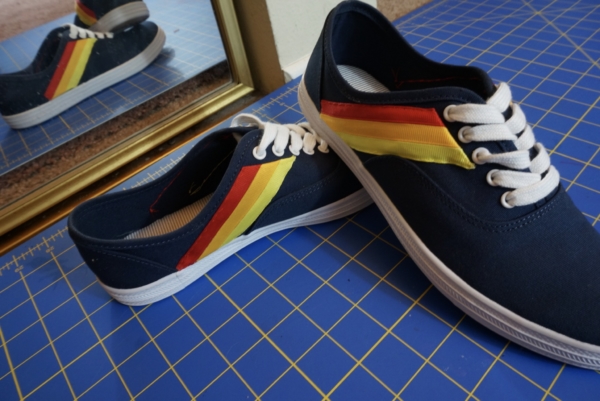
Interestingly, they also look kinda nineties since those bold stripes reared their heads in that decade too… and again now… and forever… because that’s how these trend things work.
Keep reading for some how-to info. While I opted to combine the stripes into one ribbon and sew them on, there are so many other possibilities, including just gluing or painting them on–options that you might prefer if you don’t want to get your hands beat up by a sewing needle (like mine!)
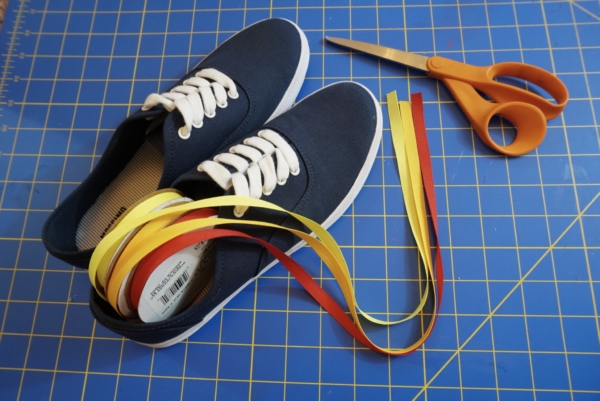
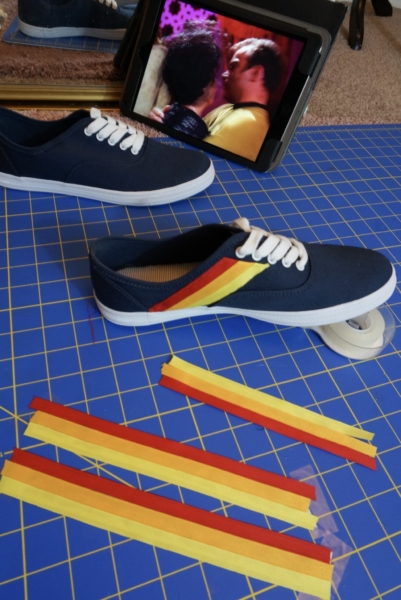
For these I used: – 1 pair of plain canvas sneakers, unlined – 3/8” grosgrain ribbon in 3 colors – 1” plain ribbon – E-6000 glue – Scotchgard* – Fray-check – Needle, pins and thread that matches your ribbons – Thimble (a bonus, but highly recommended)* ( * =optional)
I initially tried to find ribbon with all three of the colors I wanted (worth a shot!), but a great alternative was just to mix and match some grosgrain ribbons until the stripes felt just right. I recommend grosgrain because it has a nice weight and texture for being used on a shoe, and will hold up a lot better than a satin ribbon. Additionally, it’s thick enough that the glue doesn’t bleed through.
You can, as mentioned before, just glue the stripes directly on the shoes, but here’s the reasoning behind my chosen method:
I decided to make everything into a stiff appliqué and sew it on because— A) Anything I did would be reversible B) Since grosgrain and most other ribbons fray like crazy, I could easily turn under the cut edges C) It just looks fancier! AKA more expensive, AKA more like an original part of the shoe
I had some very plain, thin 1” ribbon lying around which made a perfect base.
Spreading a thin layer of E-6000 on it, I placed my middle color first, right down the center. This gave me a good guide to place the other two. If you chose ribbons with the same measurements as mine, they’ll hang off the edge a bit– This is a good thing. WE WANT THIS!
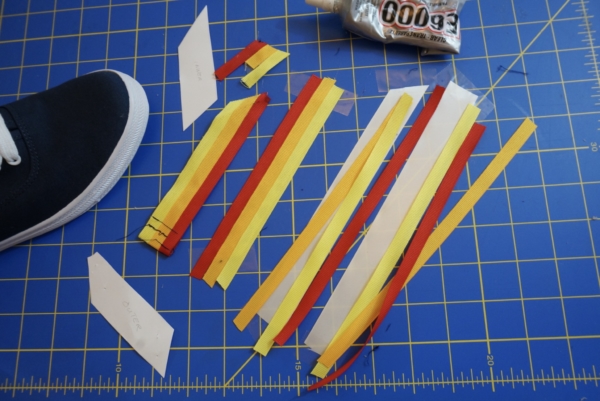
The reason that it’s nice to have them hang off the edge is that when sewing, you won’t be forcing your needle through a thick layer of rubbery E-6000! Keeping the outermost edges clear of glue and an extra layer of fabric will make the sewing MUCH easier.
After the glue dried from making all the ribbons into one super ribbon, I decided to throw in an extra step to help things last. Since these decorations will be down on my shoe, privy to mud and puddles, I took them outside for a quick spray with Scotchgard.
Once I got started with placement, pins were essential to keeping things aligned while I worked.
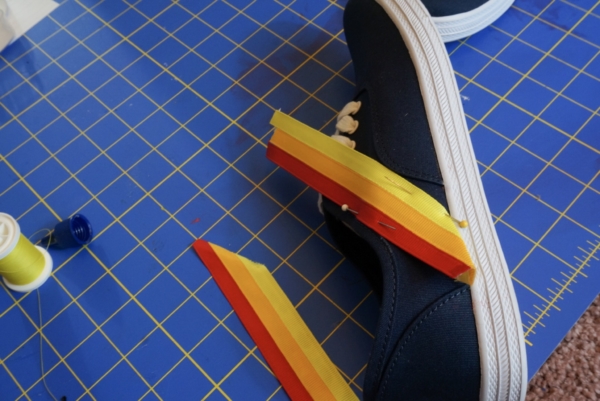

Even though I folded the top and bottom of my stripes, there are some raw edges at the corners, which I sealed up with Fray-check.
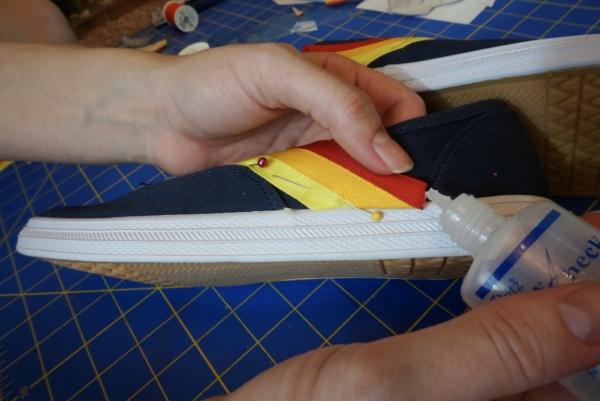
I used a backstitch (sort of), but a running stitch would work too. If you need a quick brush-up on hand-sewing, here’s a great set of stitch instructions from Apartment Therapy! Still not confident in your hand-sewing? As long as the thread matches the ribbons, this is a verrrry forgiving project. I mean, can anyone achieve a perfect stitch when one hand is buried in a shoe? So go easy on yourself 🙂
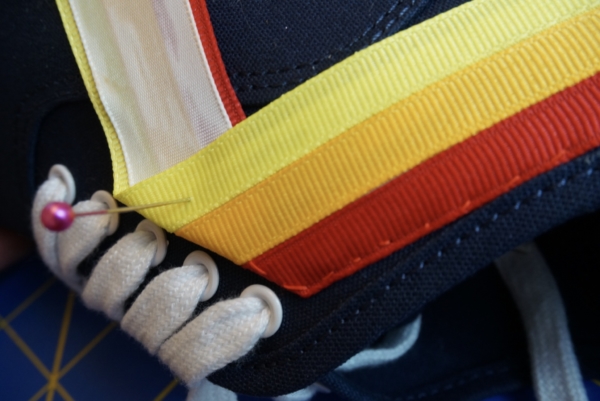
My sneakers weren’t too hard to sew through, even though my thinnest needle was still a little thick for the job. Even so, my fingers got beat up and I should’ve been better about wearing my thimble.
But the results were totally worth a bloody thumbnail!
Pro-tip: Star Trek ToS is great craft viewing!
