So, I got this pair of vintage metal catalog drawers, and wanted a cutting board on top that would roughly match the hideous faux-wood formica of my ancient counter tops. Foolishly, I went on a spree of purchasing cutting boards without taking any measurements. “This looks about right!” isn’t science, but it is how I roll.
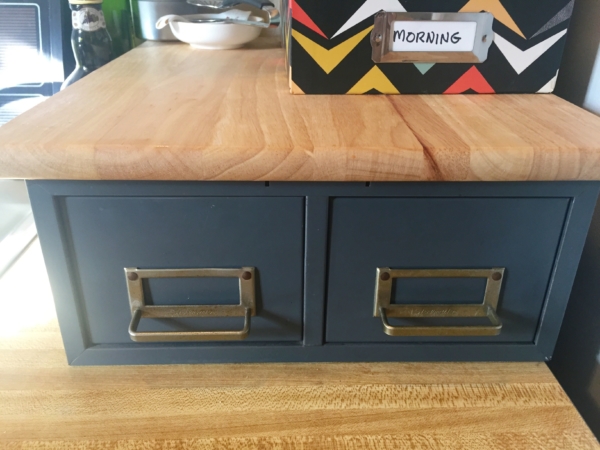
I ended up with a big pile ‘o’ cutting boards including one that worked and a bunch that were returned. Alas, there was one online purchase that was a bit bothersome to send back. (To be fair, I did measure this one, but Amazon listed the dimensions in a dumb way.) So into my “future gifts” pile it went…
Until I wanted a tray.
My studio apartment has a lofted bedroom, and I’m always trying to bring about twelve things too many up the stairs with me, particularly for nighttime or a meal. (And, as I hazardously juggle these items on the staircase, the thought flits through my mind: “This is how I will die one day.”)
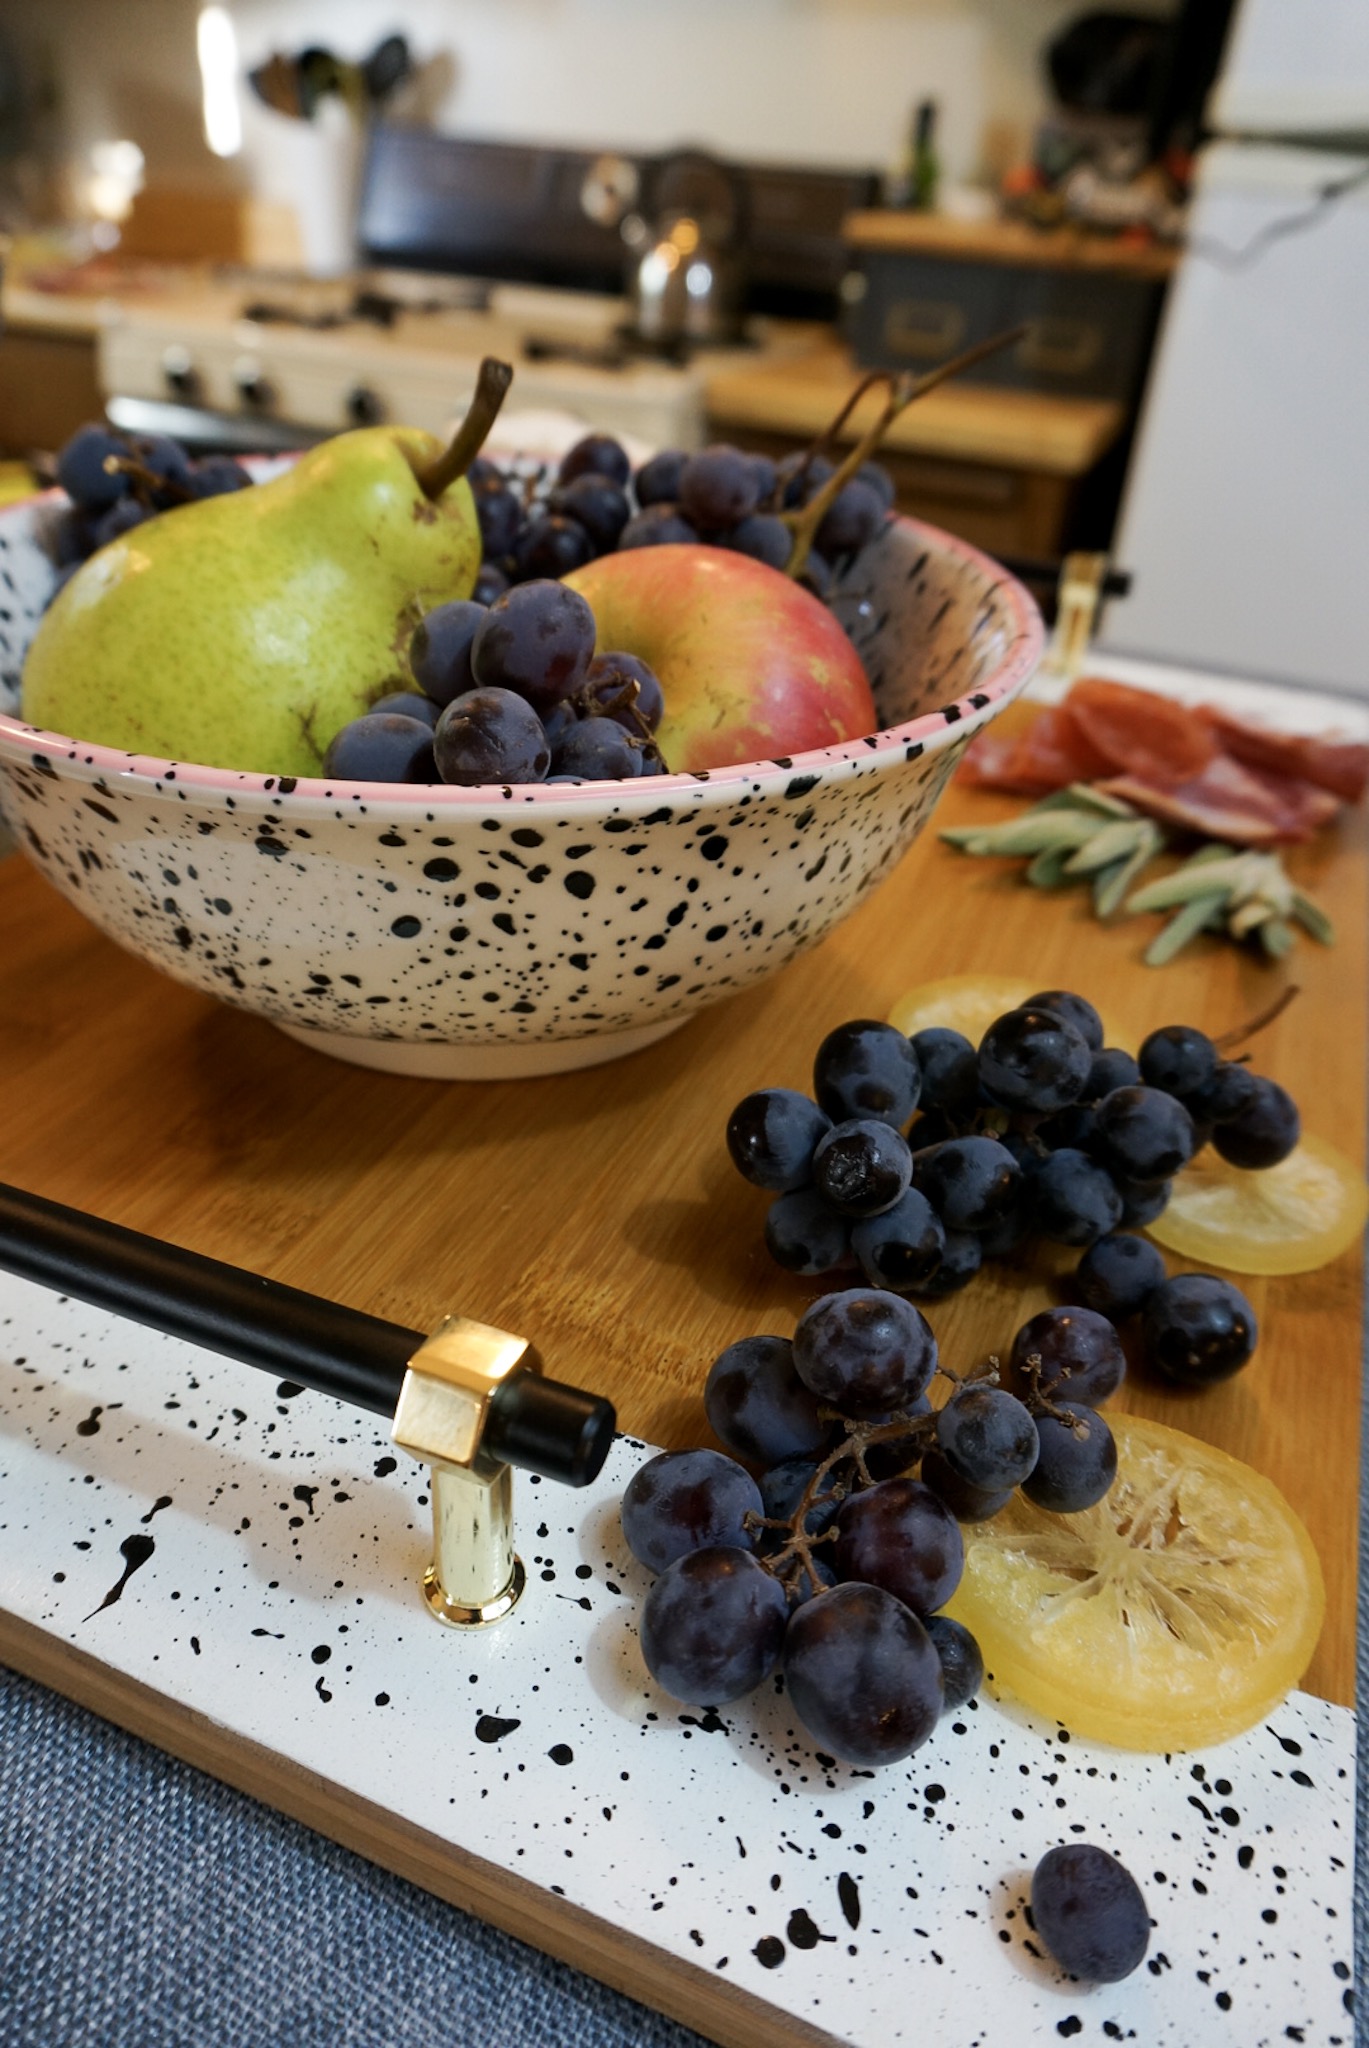
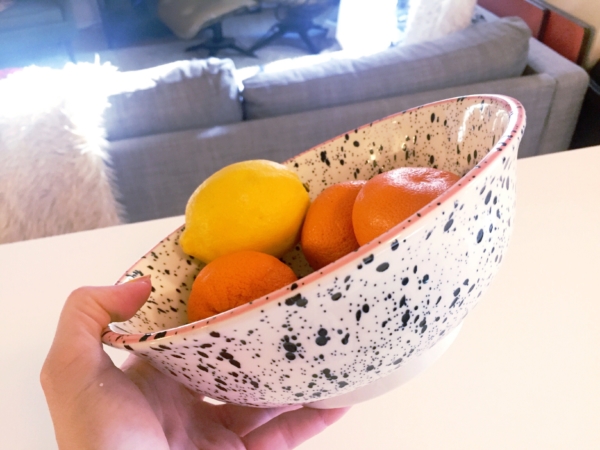
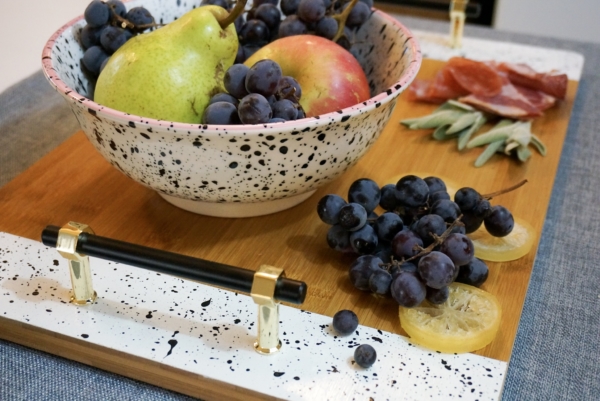
The cutting board was rescued from its brief hibernation and I immediately knew what I wanted to do with it thanks to an inspirational fruit bowl.
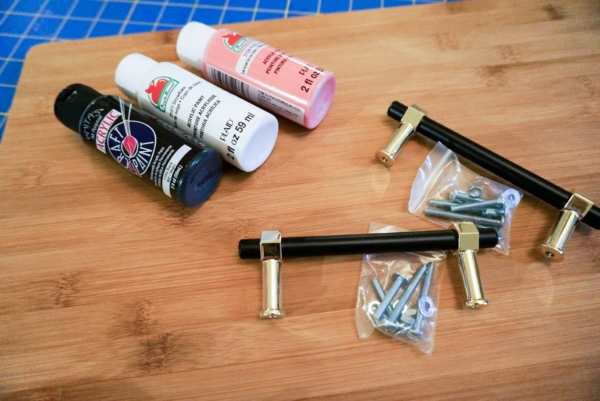
I hit the craft store for the supplies: just some non-toxic acrylics and a couple of lovely drawer pulls.
The whole lot of it lingered for awhile, as my projects often do, and then finally—
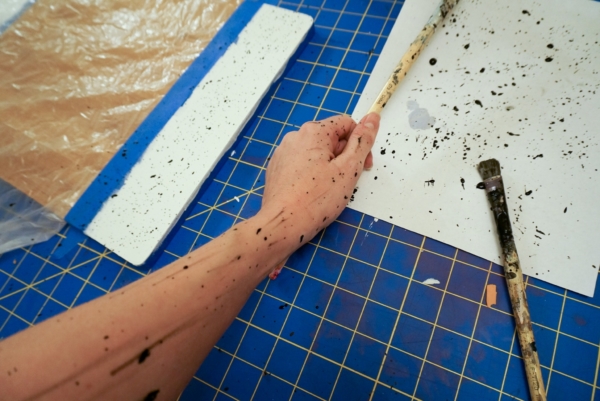
The impulse to make this splatter painted tray swept upon me at night. I abandoned the sensible notion of waiting until daylight–when I could take it outside–and instead, splatter painted in my carpeted bedroom instead. Now, some of you might say, “That’s a good way to ruin your carpet, Katinka,” and you’d be wrong, because small splatters of black acrylic paint can be easily snipped from the top of a carpet with scissors. Then you might say, “That’s a good way to ruin your favorite workout top, Katinka,” and you’d be very right. It was.
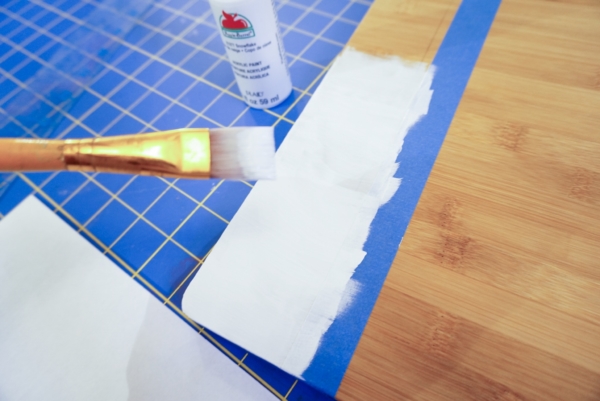
Even though I bought paints and sealer that appeared to be food safe, I wanted to keep the paint to the edges, so that I could throw charcuterie all over this thing without much concern. I taped everything off, figured out where I wanted the handles and went for it.
None of this really needs a how-to, but the splatter painting part is quite technique-heavy, so I’m gonna skip to that.
When splatter painting:
- DO as I say, not as I do, and probably take this ordeal outside
- DON’T wear anything you love (or anything at all if you want to spice things up)
- DON’T mind if you look like you have a splattery rash all over you until your next shower
- DO tape off your painting sections, and DO cover every part that you don’t want painted with paper or plastic
- DO have a cup of water on hand, as well as some scrap paper
My technique was as such:
For my weapon of choice, I chose an old artist’s brush, with fairly coarse bristles. The cup of water was on hand to help me control the consistency of the paint. Even though cheap craft acrylics are already pretty runny, adding water was very helpful in controlling the paint job.
But the best tool of all was the scrap paper. Unless you like playing fast and loose when crafting (and if you decided to do this project naked, you might be the type), I highly recommend not only experimenting with your technique on the paper first, but also splattering the paper every time that you reload paint. The first “spray” is always a wild card, so I found it helpful to get it out of the way on paper first, particularly since I was seeking a uniform splatter.
As for the splattering itself, you may or may not have learned this method in grade school: You simply thwack your paintbrush with some other stick-like object (another paintbrush, a ruler, etc.) while hovering over your target area.
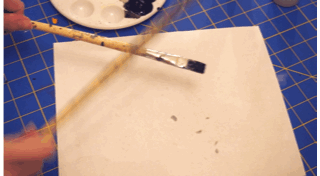
You are guaranteed to make the mess you seek.
Then after making that wonderful mess, you have the satisfaction of revealing that beautifully clean line…
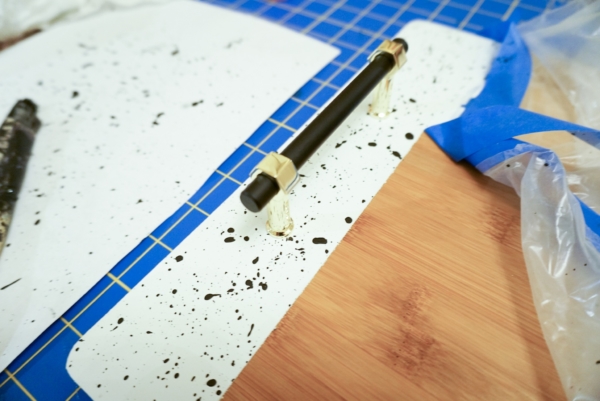
Voila!
Addendum
I was going to add a pink stripe, just like inspirabowl, but I tested it on a piece of paper and it looked too cutesy for my tastes.
If any of you couldn’t focus on the how-to because you were wracked with concern for my workout top– it’s totally okay. The pink paint that I abandoned during the project matched the top perfectly, so I just applied pink dots on top of the black dots. Thanks to this totally whole-assed solution, my workout top will live another day.